Pages

Search This Blog

Sunday, October 7, 2012

Timelines- Using Knuffle Bunny


In Social Studies we have been using time lines to learn Past, Present, and Future. 
Our sweet families have helped with the unit by making a timeline of the student's lives for homework.  We sent home a sentence strip and asked to to add pictures and events using past, present, future sections.   They came super cute.  I decorated the hallway with them for Open House. 

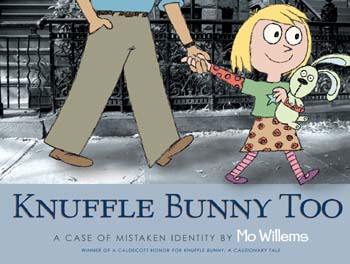
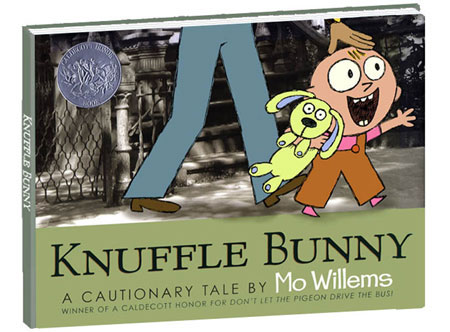
As a lesson in class we read 2 of Mo Willems' best works of art.  Knuffle Bunny and Knuffle Bunny Too.  We compared Trixie, the main character, in both books.  How did she change?  How can you tell?  Then we predicted what might happen in her future. 

                      
After the discussion, I put the kiddos into partners and gave them the following materials: paper/adding tape, Popsicle sticks, and 3 post-its.  Using these materials they made a timeline of Trixie's life- past, present, and future.   Here's my teacher example they had to look at. 


   One of the reasons I love Mo Willems so much as an author/illustrator is because he creates his characters to be simple enough that children can draw them.  Obviously he's right because I wouldn't have been able to make these pictures of Trixie look so similar to the book.  Way to go Mo.  Thanks for making me feel like a talented artist! 


The kids' time lines came out great but note to self...don't forget to tell them not to copy everything on the teacher example.  Sometimes I forget it's still the beginning of the year.  Then I'm walking around looking at 12 of my time lines.  Reality Check. Clear directions are everything. 

There were some really creative groups however.  One of them said that in the future Trixie will probably pass down her Knuffle Bunny to child.  Is that a science life cycle connection?  I think so!  That one and a couple others made it on the Social Studies Wall. 

Saturday, October 6, 2012

Meet The Tadpoles

Two weeks ago I got a pretty funny e-mail.  One of our Kinder teachers said, "My sister found some tadpoles in her hot tub.  Anybody want some for their classroom?" Only a teacher would think to share at a time like this. I of course replied Yes!  I'm also thinking maybe I now have my premise for my children's book.  Tadpoles from the hot tub.  haha

Problem was... I had nowhere to put them.  I sent an e-mail out to my students' parents asking if anyone had an aquarium they weren't using.  In less than 15 minutes I got a response from a family offering to buy an aquarium for the classroom! Woo! Awesome!!! Here she is. Way fancier than I ever expected.  Kinda puts poor Buddy's bowl to shame. 
 Here's a close up of one of the little guys.  They are just starting to form some teeny tiny back legs.  After I took one shot of this one he totally turned to face the camera.  I took a couple more since I thought this was hilarious. Then I had a moment  of panic...did I just blind the poor little guy? He must have gotten stunned from the flash.  He's couldn't posing for goodnesssakes.  sigh.  Just the first of more trauma to come from being a tadpole in a class of 22 first graders  and 1 zany teacher. 

The kids are in love with them and it's going to be a great hands on science lesson for life cycles.  I'll keep posting pictures with the new phases. 

Wednesday, October 3, 2012

SALE!

Starting tomorrow everything in my Teachers Pay Teachers Store is 20% off! 

Stop by and check it out. 

The sale runs from Thursday through Sunday. 

First Grade Circle Store

Open House- Bluebonnet Stomp!

Last night was Open House.  It was by far the best of all the Open Houses that there ever were. And here's why.  After the parents were done in the classrooms everyone headed outside for our 1st Annual Bluebonnet Stomp!

For those of you who are not Texans, Bluebonnets are our state flower.  I am proud to say that me and 3 wonderful moms...shout out to Patty, Norma, and Lauren!...organized the whole shebang. 

First off, I ordered the seeds in bulk from a local nursery named It's About Thyme.  They gave our school a discount.  Thank you! 
My son's grandpas split the cost and donated the seeds to our school.  Here's what the seeds look like up close. 


Each of our students got a 1 ounce cup filled with seeds.  Approximately 40 seeds where put in each little cup.  The cups were also labeled by grade levels.  Our fabulous moms filled each cup.  Woo!  and sorted them into empty boxes and random trays I could find around the teacher's lounge.  After school Tuesday me and another mom delivered the trays to classrooms. 

When the night was wrapping up in the classrooms (approx. 7:15) our principal came over the intercom and announced that it was time for everyone to grab their cup of seeds and head outside the stomp.  Here is a beautiful sign with the hill in the background where we spread the seeds. 


Our PE coach let us borrow cones to divide up the hill into grade levels.  This way the entire hill got covered.  We used chairs to prop up grade level signs. 
I put out a box for people to put their empty cups in. 
I'm totally going to try to reuse them next year.                                                                  

 I wish I could post some pictures of the kids actually stomping them into the ground.  It was such a sight.  I also wish I could remember forever the feeling that came over me when I walked outside to see everyone coming together for this.  I know it sounds cheesy but just seeing the parents and kids out there participating and smiling.....sigh...it was awesome.  First I got the chills and then I just couldn't help but tear up.  Yes, I am a huge sap but it was such a wonderful night.  Parents were talking to each other, teachers were involved, and our sweet little school was a true community.  Pfluger Elementary is one special place to be!

Fingers crossed, this is what our hill will look like in the Spring.  Families will be able to come up and take pictures and the kids will feel powerful.  They are totally going to think they are responsible for every flower and that's okay with me. 


Sunday, September 30, 2012

Parent Conferences

It's that time of year again.  You know, when every committee meets, there's a meeting everyday after school, Open House is a few days away and it's time to have Parent Teacher Conferences.  That's right ladies and gentlemen...October is here.  Ready or not. 

Now don't get me wrong, I absolutely adore my job but each and every October sends me into a frenzy.  sigh...It's always great but it's always hectic. 

What's really stressing me out is I'll be out for the first time this for an all day science training Monday and Open House is Tuesday.  First time with a sub and also the first day after school clubs are starting.  Lord I hope everyone gets to the right spot.  I'm freaking out about it.  I was as detailed as possible in my sub plans about who goes where so hopefully it all works out.  Open House is going to be just fine I just get worried about cleaning up the room.  I'm also planning our school's first Bluebonnet Stomp that night.  I'm really excited about it!  Each student will get a cup of Bluebonnet seeds (our state flower) to help stomp/plant on a hill outside our school entrance.  In the spring our students will drive by it at drop off/pick up.  It's also a Texas tradition to take pictures in the Bluebonnets each spring.  Now we'll all have a place to do it without having to pull over on the side of the highway.  That is...if they bloom! haha

It's been a pretty big undertaking as the date totally snuck up on me.  Thank goodness I have wonderful parents and 2 Texas State interns this year who are super helpful.  Two moms alone filled the cups with seeds for the entire school!  Whew. 

So what should be on my mind is what I'm going to pass out and say at Open House.  But, I just can't help myself this weekend.  I've been obsessed with uploading things on my Teachers Pay Teachers store. Click the link below to take a look at my handouts I'll be using Tuesday to help parents sign up for conferences.  If you are freaking out about making something for your room maybe this will save you time. 

Parent Teacher Conference Packet


Thursday, September 27, 2012

Math Centers


Here's how Math Centers work in my room.  I started using them last year and oh my word, it's totally changed my life.  I meet with my small groups while the kiddos are busy with their tubs.  It's one of those rare times you get to target instruction for you low babies.  I can't believe I ever taught without them.  Well, yes I do.  I just didn't do a great job at teaching back then.  I mean you can't teach reading without guided reading, so you can't teach math without guided math, right?


My amazing, beloved co-worker Katy found this chart system on Pinterest or somewhere.  You use numbers for math tubs and letters for literacy tubs.  Genuis!  I was making it waaaay too complicated.  I have to admit this poster is not up to my cuteness standards but it does the job.  Once October madness is over I hope to revamp it. 
 The kids' names are moved with the help of velcro and the little stickers are just there to help them find their group faster.  They are grouped with by levels of course.  (lows and meds, meds and highs)

Here is the math tubs shelf.  The numbers were made with my new bet friends...poster numbers/letters purchased at Wal-Mart on the arts and crafts isle.  Why didn't they have these when I was in school? Love them!


What's inside the buckets?  The activities rotate with subjects we are studying in math.  The idea is to supply activities that review/reinforce learning. 
Bucket 1: Number Words

I got this fun little activity from the one and only Cara Carroll of First Grade Parade.  It was in her math centers packet on Teachers Pay Teachers.  The students match the number to the number word and record both on the handout. 
 
_______________________________________________________

Bucket 2: Roll a Learner

Also, from Cara's Math Packet.  The kids roll a dice and add the corresponding item to their drawing.  Eventually the picture will reveal a learner.  :)

_______________________________________________________________

Bucket 3: Comparing Numbers

This is an activity we practiced last week in math.  The students compare 2 numbers of their choice in standard form, written form, and modeled on a tens frame. The students also compose a comparison sentence using the two numbers. 
 
_____________________________________________________________

Bucket 4: Estimation Jar

This handout is from Cara's Math Centers Packet.  The students first estimate how many objects are in the jar.  Then they count and record the actual number.  Last the students compare the estimate to the actual number.  I got the jar from Dollar Tree.  I pan on putting cute seasonal objects in it when it's time for a new number.  We started with cubes but October will have candy corn, December will have peppermints, and so on. 

_________________________________________________________________

Bucket 5: Calendar

Cara's Calendar Companion Packet has blank calendars in it.  My kiddos are using her amazing math binders.  They LOVE them.  I really promoted them to be really big kid stuff.  They are so funny with them.  One day when we were using them to do number of the day I said, "Man you guys are so smart!  Do you feel smart?  My sweet little guy helpd up his binder and said, "I feel powerful!"  Best moment of the school year to date.  I cried a little.   

So, in this center they complete the calendar for the month we are currently in and add it to their math binder. 
 
_____________________________________________________________

Bucket 6: Pattern Block Creation

Here's another handout from Cara.  The students use pattern blocks to create a design.  At the bottom the students record the number of each type of shape used.  The mats are laminated so that the students can use vis-a-vis markers and then wipe them off for the next group. 


Check out this sweet pupppy one of my kids made. :)


_________________________________________________________________

Bucket 7: Numbers Packet

I have no idea where this packet originated from or I would totally give them credit.  It's pages have the students working with numbers 1-20.  The students trace the number, write it, write it in words, and circle the number in a scramble. 


_________________________________________________________________

Bucket 8 (Last One): Pattern

Students use the laminated templates to make animals and other designs. 


So there they are in all their glory.  They are working out beautifully.   


Saturday, September 22, 2012

Science- Freeze Experiment


Now that we've established what melting means in science it's time for freezing.  Our poem of the week was "Apples"

Apples
Apples, apples what a treat.
Sweet and tart and good to eat.
Apples green and apples red
Hang from branches over head.
And when they ripen
Down they drop
So we can taste our apple crop.

Before I told them what we were doing, I asked them to design an experiment for our class.  I asked this question to get them going.  If melting means we give a lot of heat to a solid, what would taking the heat away mean?  After a few times repeating that and some agonizing wait time one of my babes shouted out Freezing!  (They won the smarty pants award for the day)  We talked about times in our lives when we freeze things. 

*Science Tip*
I learned in my science training coop with UT that it is important to explain you are taking heat away to freeze.  You cannot give something cold.  You can give something heat or take that heat away. 

Next, I asked them what kind of liquid we could use in our experiment that would go along with our poem of the week.  Apple Juice!  We listed materials we would need on the board.  Then I told them I just happened to have all the materials ready to go.  They were so excited! 

We used some little plastic cups, Popsicle sticks, and apple juice.  The kids labeled their cups with a sharpie. 

We started Friday morning with this activity so they would have plenty of time to freeze.  We used the freezer in the Life Skills classroom and made some extras for those kiddos as a thank you. 
Here's the before pictures:

Next, we talked about how this was another experiment they could do at home.  You can try any liquid you like.  They brainstormed other liquids they might try.  We also looked around the classroom for other liquids we might find.  We found Dr.Pepper, water, and coffee.  (I wanted to make a salt water solution to connect to the ocean, but I didn't have any salt!)

Speaking of not having materials...shout out to L.H. and J.H's mom for saving the lesson.  I asked her to go to  the store and pick up some juice because I totally forgot to bring it to school!  What would I do without my amazing parents?????

While my kids were at PE I picked up their Popsicles.  They were waiting at their desk for them when they walked in the classroom.  You would have thought it was Christmas morning.  lol  They ate them for Fun Friday (last 30 of the day we just do fun stuff if they are done with all their work)
Here's the other frozen liquids.  I also mad a cup without a stick and one cup with a bunch of sticks just so they would know the stick has nothing to do with the freezing. 


EEEWWWW One of my little darlings who is really going to work on being impulsive just couldn't help his self with the sharpie.  He tried his best to color the entire stick before I stopped him.  Sigh....It came off in his Popsicle. Note the weird color.  Good thing I made an extra one.  Although I totally made him sweat it out a bit that he wasn't going to get to eat one because he didn't follow directions.   
It was another great day and a great lesson.